This month’s Slide Makeover features a slide with a background that’s the wrong color combined with boring type. SmartArt and Remove Background to the rescue!
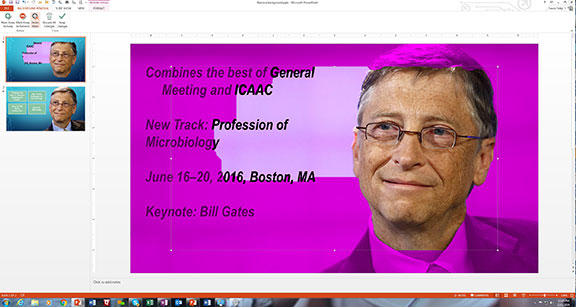
Before

Problem 1
I don’t like the background color. Nothing against lavender, but in this case it doesn’t go with my PowerPoint theme colors.
Problem 2
The type is ugly and boring.
After

Solution 1
Using the Remove Background tool, I was able to isolate the photo of Bill Gates and delete the background.
Follow these steps to access and use the Remove Background Tool:
- Select the image you want to edit.
- Under the Format tab on the Ribbon select Remove Background on the far left of the screen.

- Anything that is pink will be hidden in the photo. In some versions of PowerPoint, you’ll get a preview of your results in the thumbnail window on the left. In this example, the text was part of the image, so it needs to be removed, too.
- Use the available tools to adjust the mask until the pink covers up all of the unwanted parts of the photo.
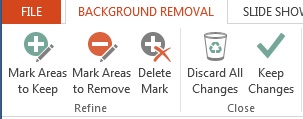
- When you’re happy with the results, click Keep Changes. The original image remains intact, so if you want to make changes later on you can.
Solution 2
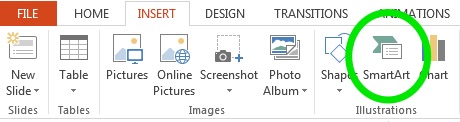
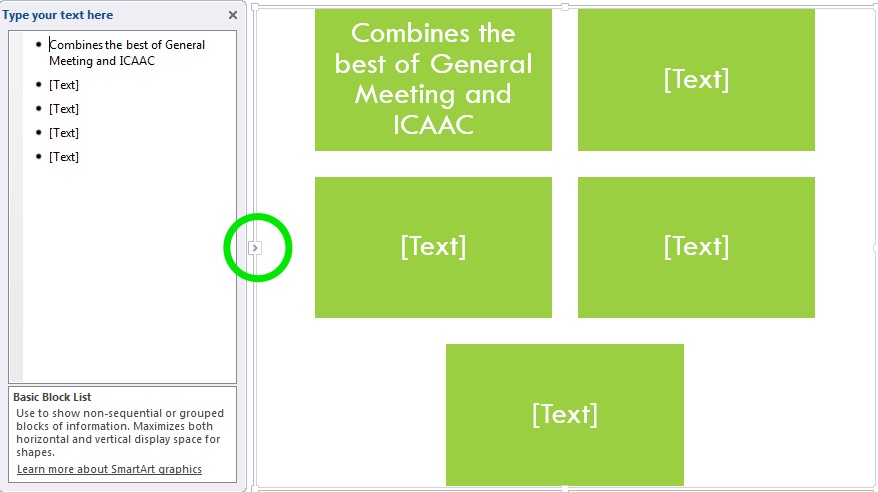
The text was retyped and put into a SmartArt graphic.
Follow these steps to access SmartArt:
- On the Ribbon, click the Insert tab then SmartArt.
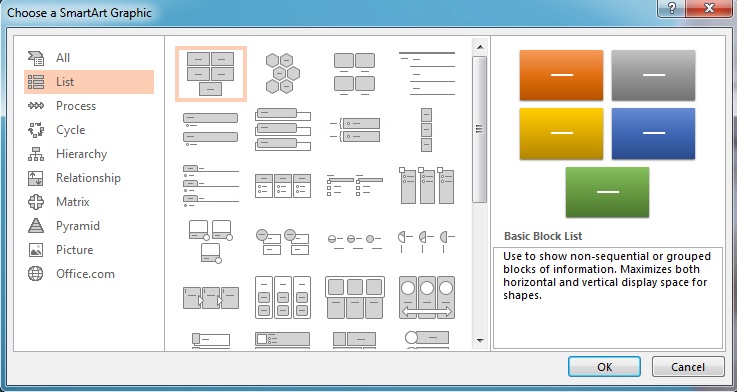
- A window will appear that lists the many SmartArt formats. Select the List format and choose the layout you like. For this slide, I chose the first option.
- Once you’ve chosen a layout, type the text into the window. Every time you hit Return, you’ll be starting a new text box. If there are too many text boxes, just delete the bullet pointed [Text] placeholders. Toggle the text window on and off by clicking on the little box with the arrow in it that’s circled in the image below.
- You can change the SmartArt layout and colors by selecting options in the SmartArt Tools tabs in the Ribbon.

- Play around with the SmartArt settings until you get something that looks good.
The Takeaway
Just because you’re saddled with a bad photo doesn’t mean you have to live with it. With a few simple steps, you can make it look exactly how you want!
You must be logged in to post a comment.